Manual PW-01
Installation and user manual
Pegworks Peg Mount: securing a motorcycle by its footpegs for transport on a trailer
Read before first use
PDF, 0.8 MB. Version 1.0, September 2026.
| Product | Pegworks Peg Mount |
|---|---|
| Model | PW-01 |
| Batch | 2026-01 |
| Manual version | 1.0, September 2026 |
You will find the model and batch number on the product card included in the kit.
01 Preparation
Before you start
Pegworks mounts secure an enduro or motocross bike to a trailer by its footpegs. The chain pulls the bike down to the trailer floor, so you do not need straps over the seat or the handlebar for transport.
| Model | PW-01 |
|---|---|
| Max. motorcycle weight | 160 kg |
| Footpegs | Metal, with openings that allow the lock pin to pass through |
| Front wheel | Must stand in the trailer rail or wheel chock |
| Fixing to the trailer | 4 M10 bolts, grade 8.8, torque 49 Nm |
| Construction | Powder-coated steel |
| Mount with chain and carabiner | 2 |
|---|---|
| Lock pin | 2 |
| Split pin | 2 |
| Floor anchor* | 2 |
| M10 bolt* | 4 |
* only in the variant with floor anchors
Also needed to fit the anchors
- 4 washers and 4 M10 self-locking nuts
- spanners for M10 bolts and a torque wrench
- when fitting through the floor: a drill with an Ø 11 mm bit
02 Warnings
Safety
Incorrect use may cause the motorcycle to come loose while driving, a road accident and serious injury.
- Do not exceed the maximum motorcycle weight: 160 kg.
- Use only with metal footpegs through which the lock pin can be passed. Do not use with rubber-covered, plastic or damaged footpegs.
- The front wheel must always stand in the trailer rail or wheel chock.
- Always secure the lock pin with the split pin. The carabiner must be closed.
- Do not use parts that are damaged, deformed, corroded, have a stretched chain or a carabiner that does not close fully.
- Do not modify the product: do not weld, drill, shorten or replace the chain with a different one.
- Fit the floor anchors only to trailer parts able to carry the load.
- The product is intended only for transporting a motorcycle. Do not use it for lifting or as a workshop stand.
- Mind your fingers when clipping in and releasing: the chain and the mount are under tension.
- Keep out of the reach of children.
03 Installation
Fitting the floor anchors
Done once. Applies to the variant with floor anchors.
- Load the motorcycle onto the trailer (front wheel in the rail or chock) and mark the spots on the floor under both footpegs.
- Position the anchors so that they sit as vertically as possible below the footpegs. The chain should pull downwards, not at an angle.
- Bolt each anchor with two M10 bolts from the kit: to the trailer frame or through the floor. Use washers and self-locking nuts.
- When fitting through the floor only, place wide washers or a steel flat bar underneath to spread the load over a larger area.
- Tighten the bolts to 49 Nm (M10, grade 8.8).
Have your own tie-down points? You can use the mounts without floor anchors if the points are intended for securing loads, permanently bolted to the frame or floor, free of play and located as vertically as possible below the footpegs.
04 Use
Securing the motorcycle
Before every trip.
1Load the motorcycle
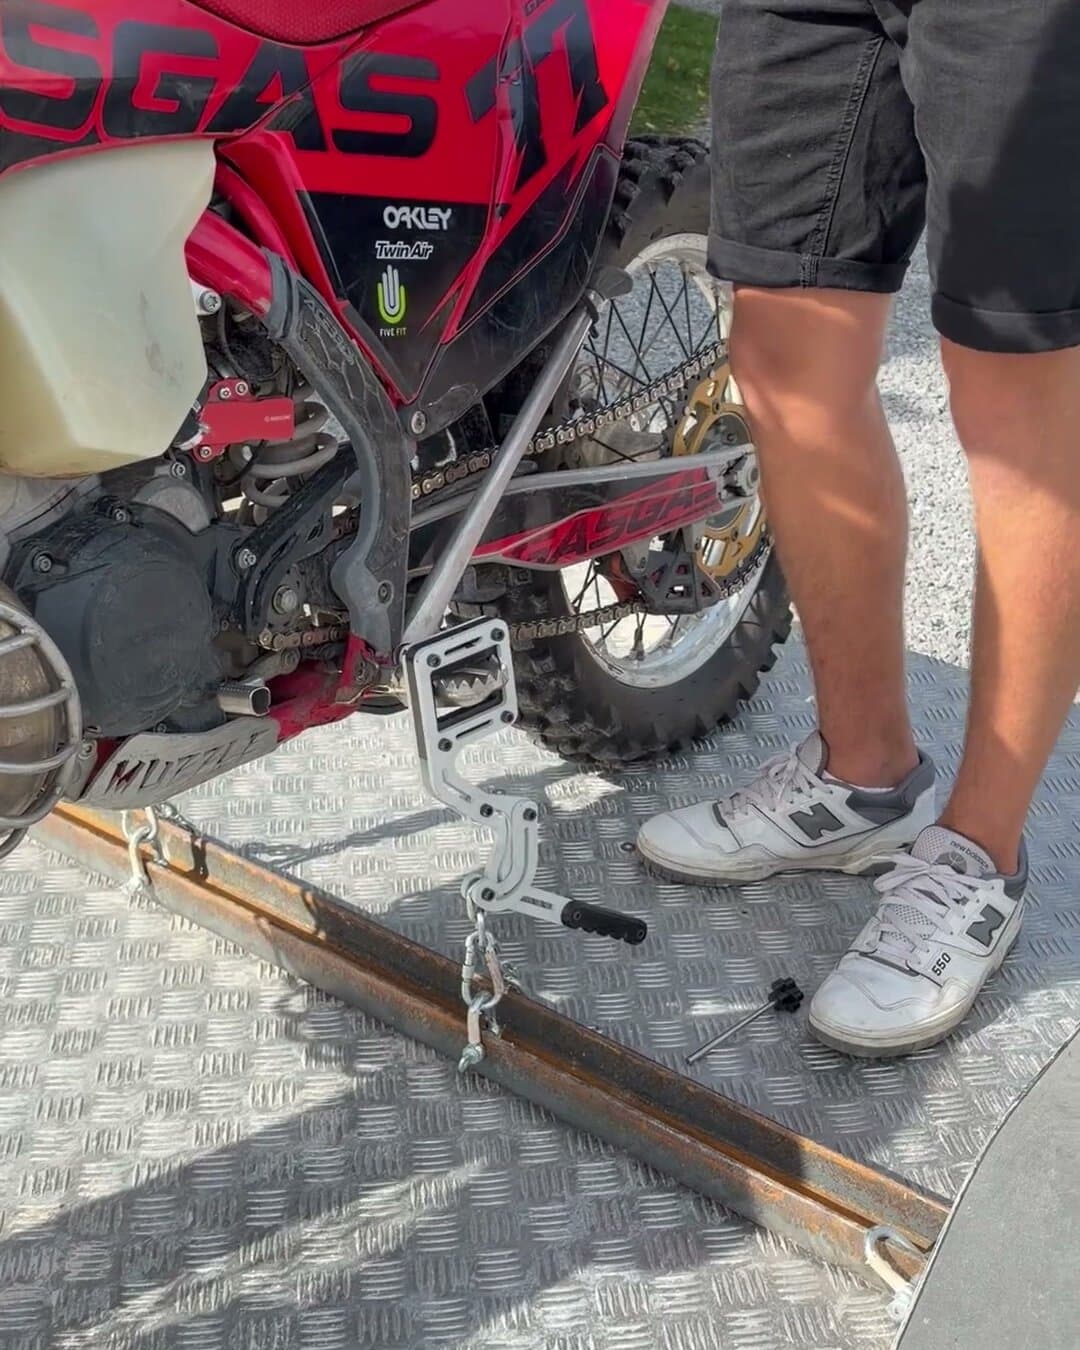
Load the motorcycle onto the trailer. The front wheel must stand in the trailer rail or wheel chock.
2Fit the mount
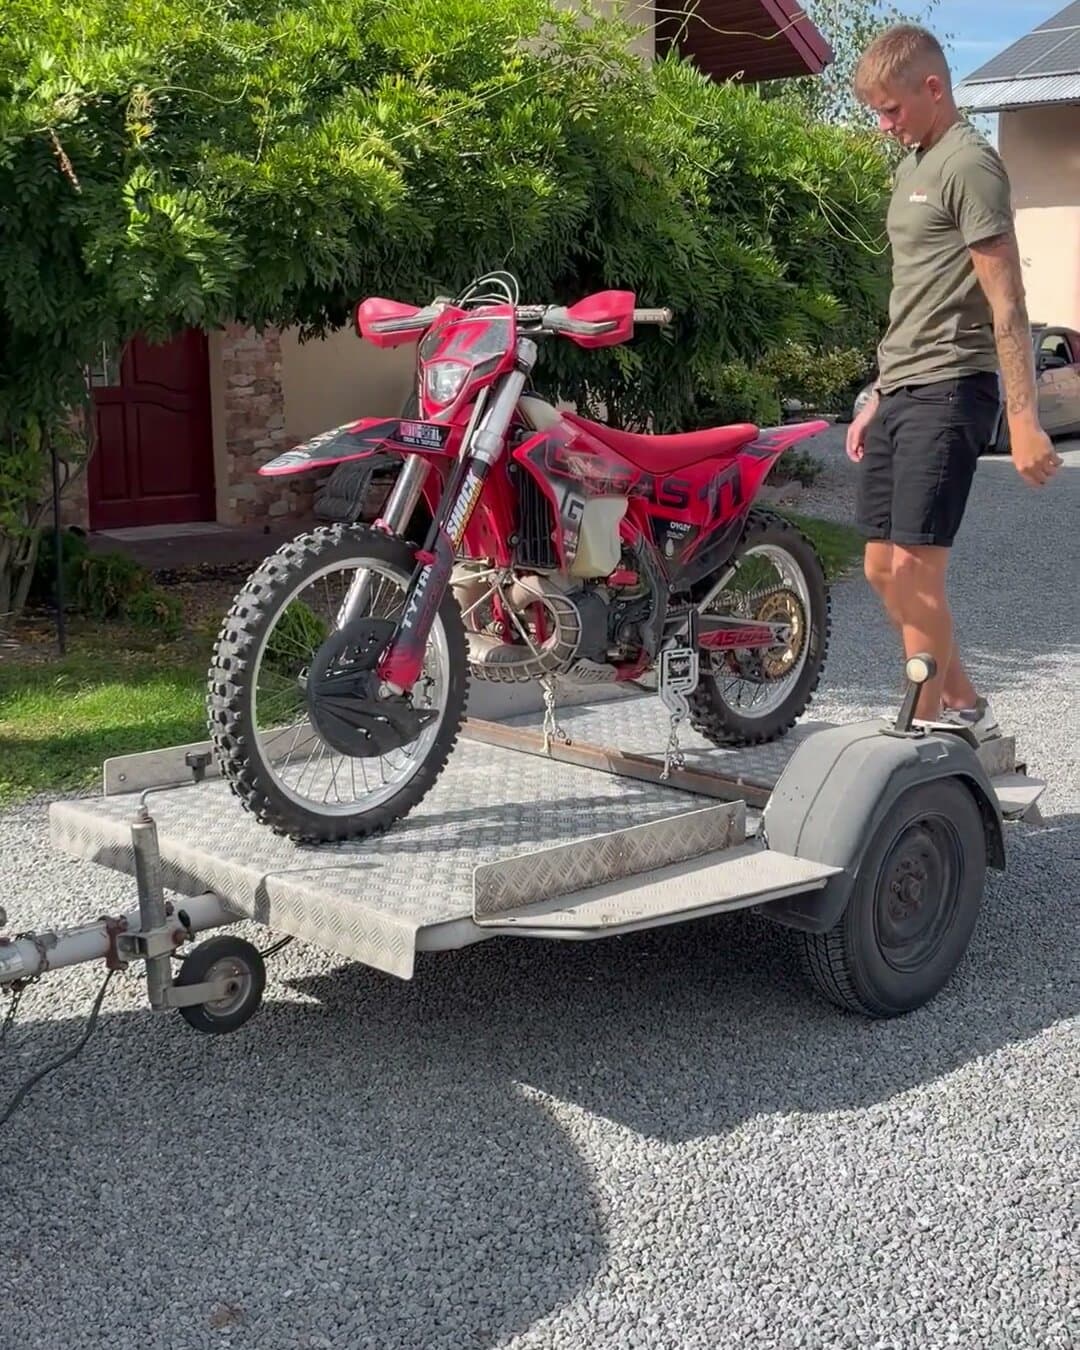
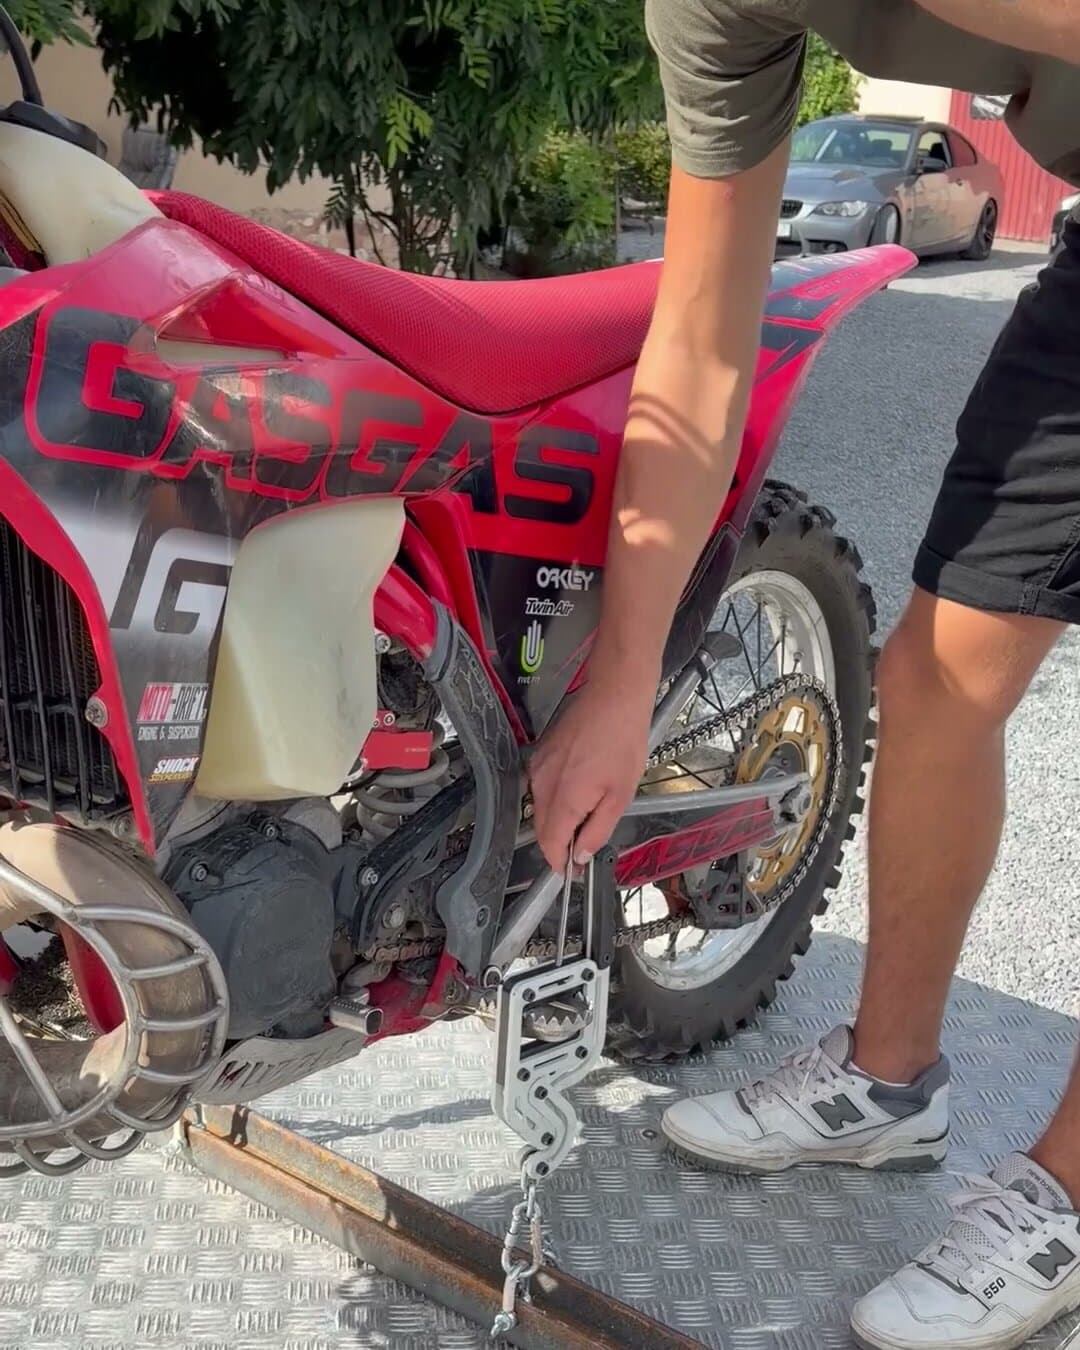
Slide the mount onto the footpeg so that the footpeg sits in the upper window of the mount.
3Lock it
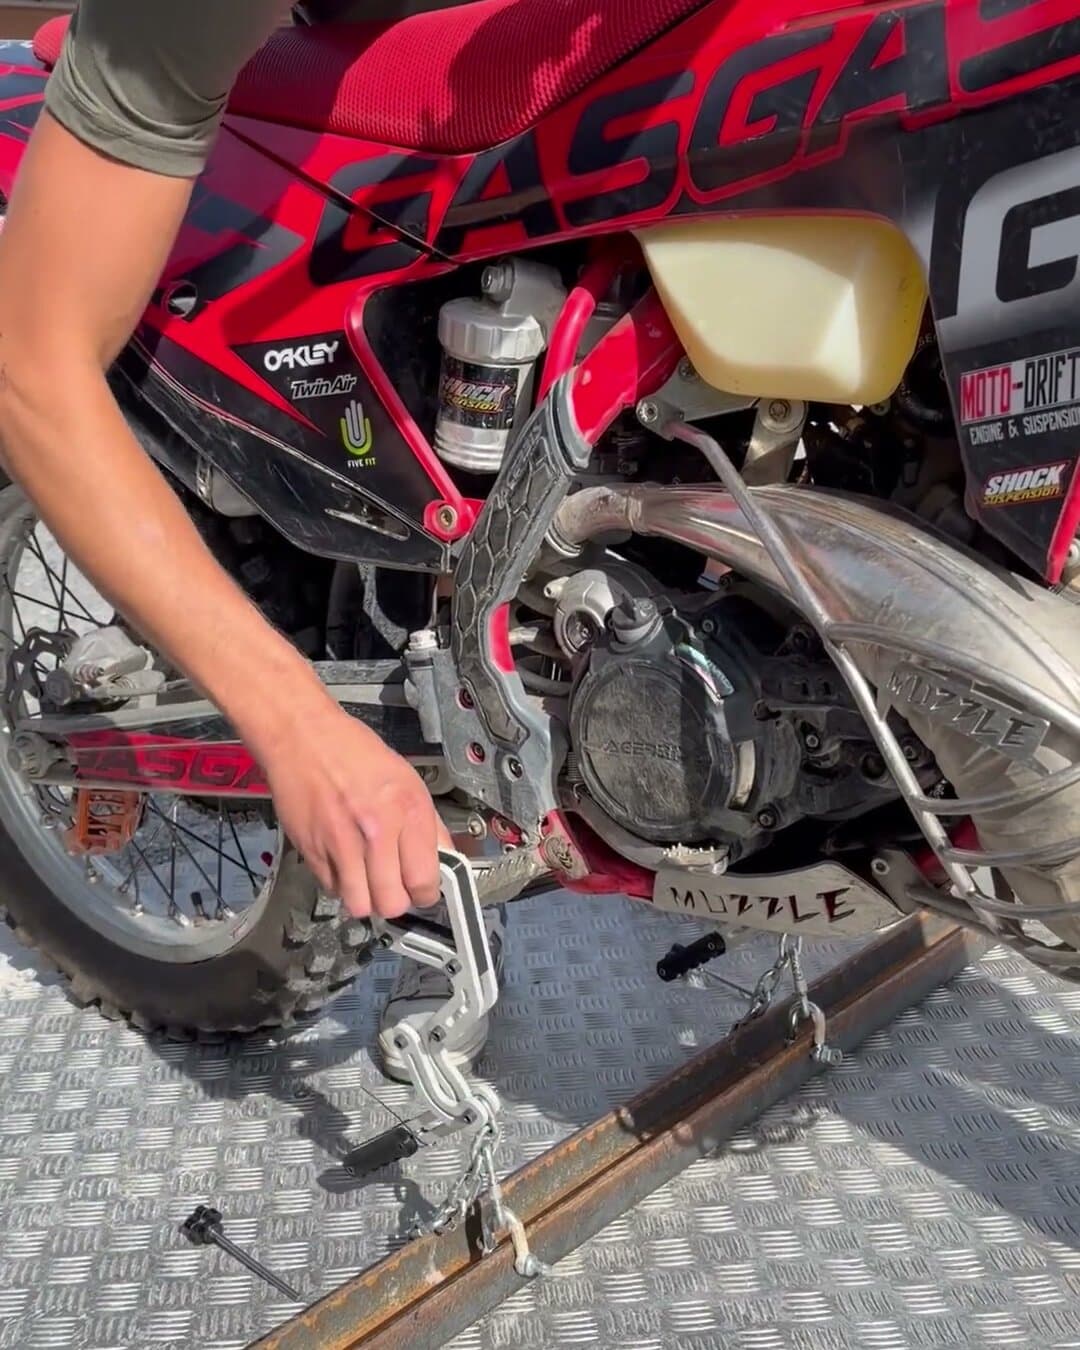
Pass the lock pin through the mount and the footpeg, then secure it with the split pin.
4Clip in and set the tension
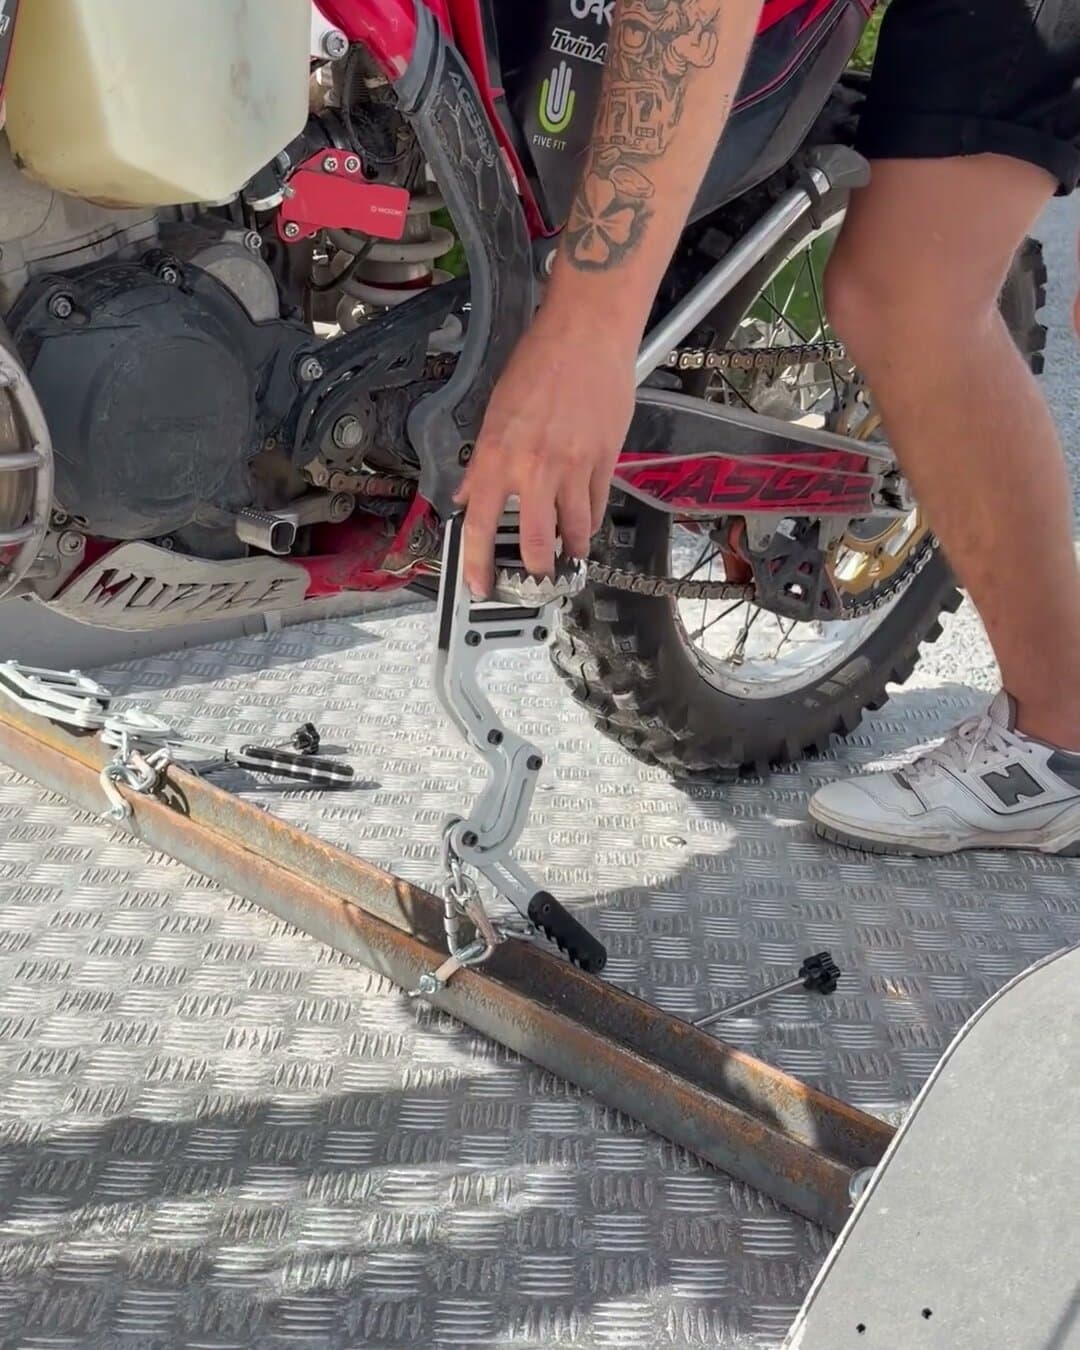
Clip the carabiner into the floor anchor. You set the tension by choosing a chain link. The motorcycle must be pulled down firmly: suspension clearly compressed, but not bottomed out. Check that the carabiner is closed.
5Other side
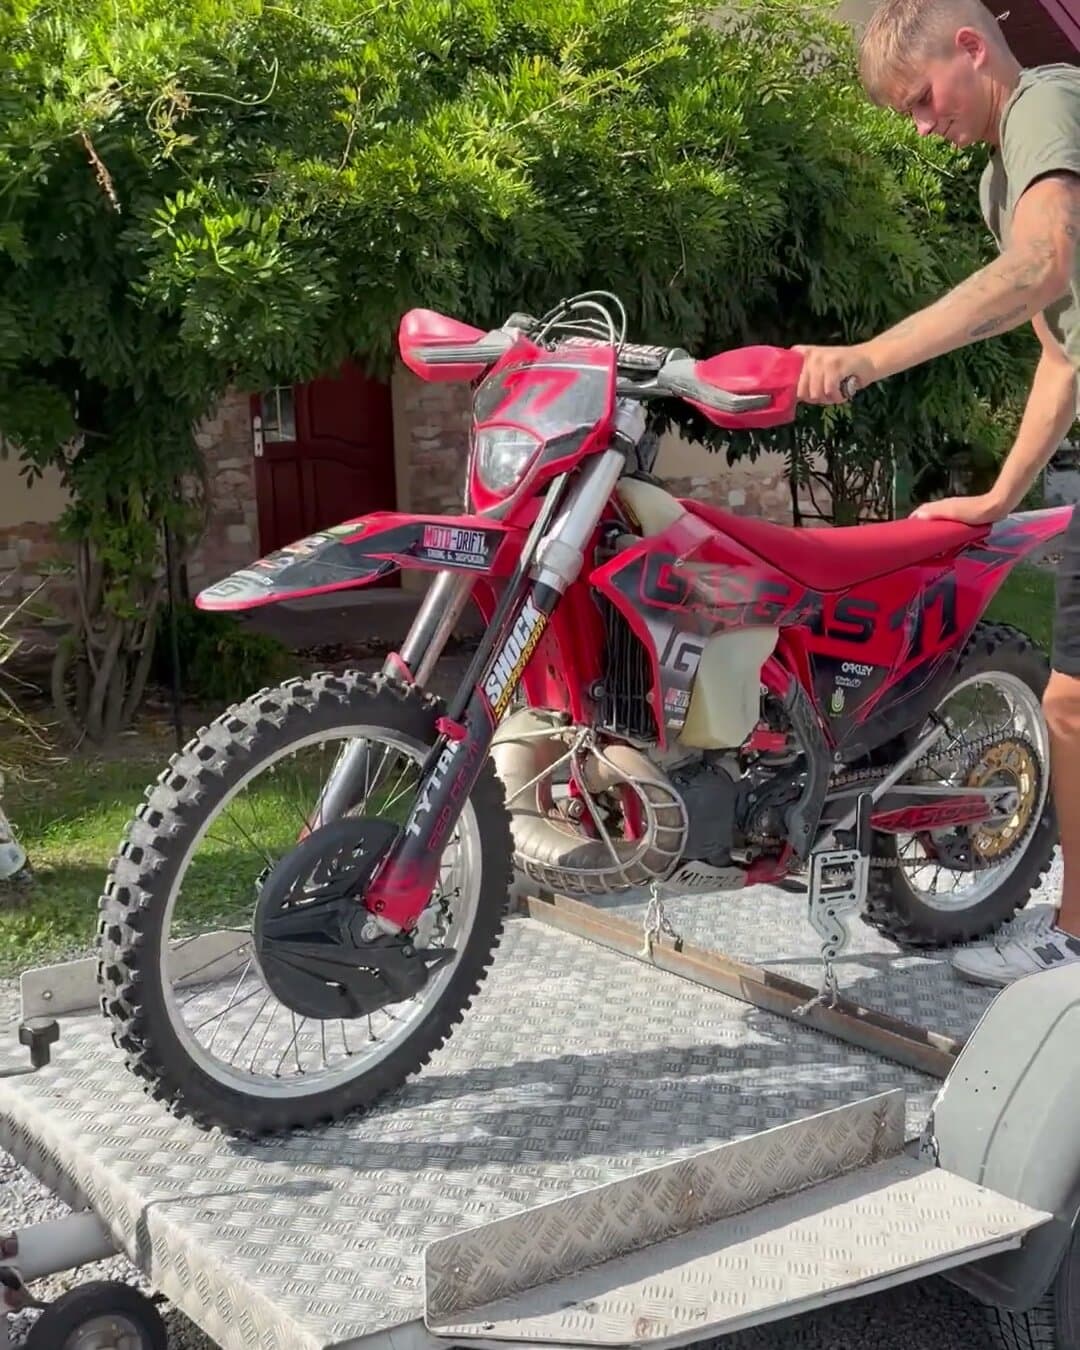
Repeat steps 2-4 on the other side of the motorcycle. The tension on both sides should be similar and the motorcycle should stand upright.
6Check
Grab the handlebar and try to move the motorcycle sideways. The motorcycle must not move relative to the trailer. If it moves, shorten the chain by one link and check again.
05 On the road
During transport
- Do the first check of the tension and the locks after 10-15 km of driving, then at every stop.
- After driving over rough surfaces (potholes, dirt roads, speed bumps), stop and check the fastening.
- If the tension has dropped, shorten the chain by one link. If any part is damaged, do not continue driving.
- Observe the speed limits that apply to vehicles towing a trailer.
- The driver is responsible for securing the load correctly.
06 Unloading
Unloading the motorcycle
- Hold the motorcycle, ideally with the help of a second person.
- Unclip the carabiners from the anchors. Once the tension is released the suspension extends, so hold the motorcycle firmly.
- Remove the split pins and lock pins, take the mounts off the footpegs.
- Unload the motorcycle from the trailer.
Tip: remember the link at which the motorcycle was held down well. Next time you transport the same motorcycle, you can clip the carabiner straight into the same spot.
07 Service
Maintenance
- After each use, clean the parts of mud and road salt, then dry them.
- Check the paint coating regularly. Touch up chips with paint to prevent corrosion.
- Check the chains, carabiners, lock pins and split pins. Replace worn parts with original parts, available at peg-works.com.
- Check the tightness of the floor anchor bolts periodically.
- Store in a dry place.
08 Contact
Complaints and contact
The seller is liable for the conformity of the goods with the contract as provided by law, for 2 years from delivery. Report a complaint by email, giving the order number, the model and batch number (from the product card: PW-01 / 2026-01) and photos.
Manufacturer
Jakub Wolak trapcode
ul. Dworskie Ogrody 1/5, 35-214 Rzeszów
NIP 8133932416
www.peg-works.com
Product
Model PW-01 / batch 2026-01
Spare parts, online manual and videos: peg-works.com
PDF, 0.8 MB. Version 1.0, September 2026.
+ Before you order
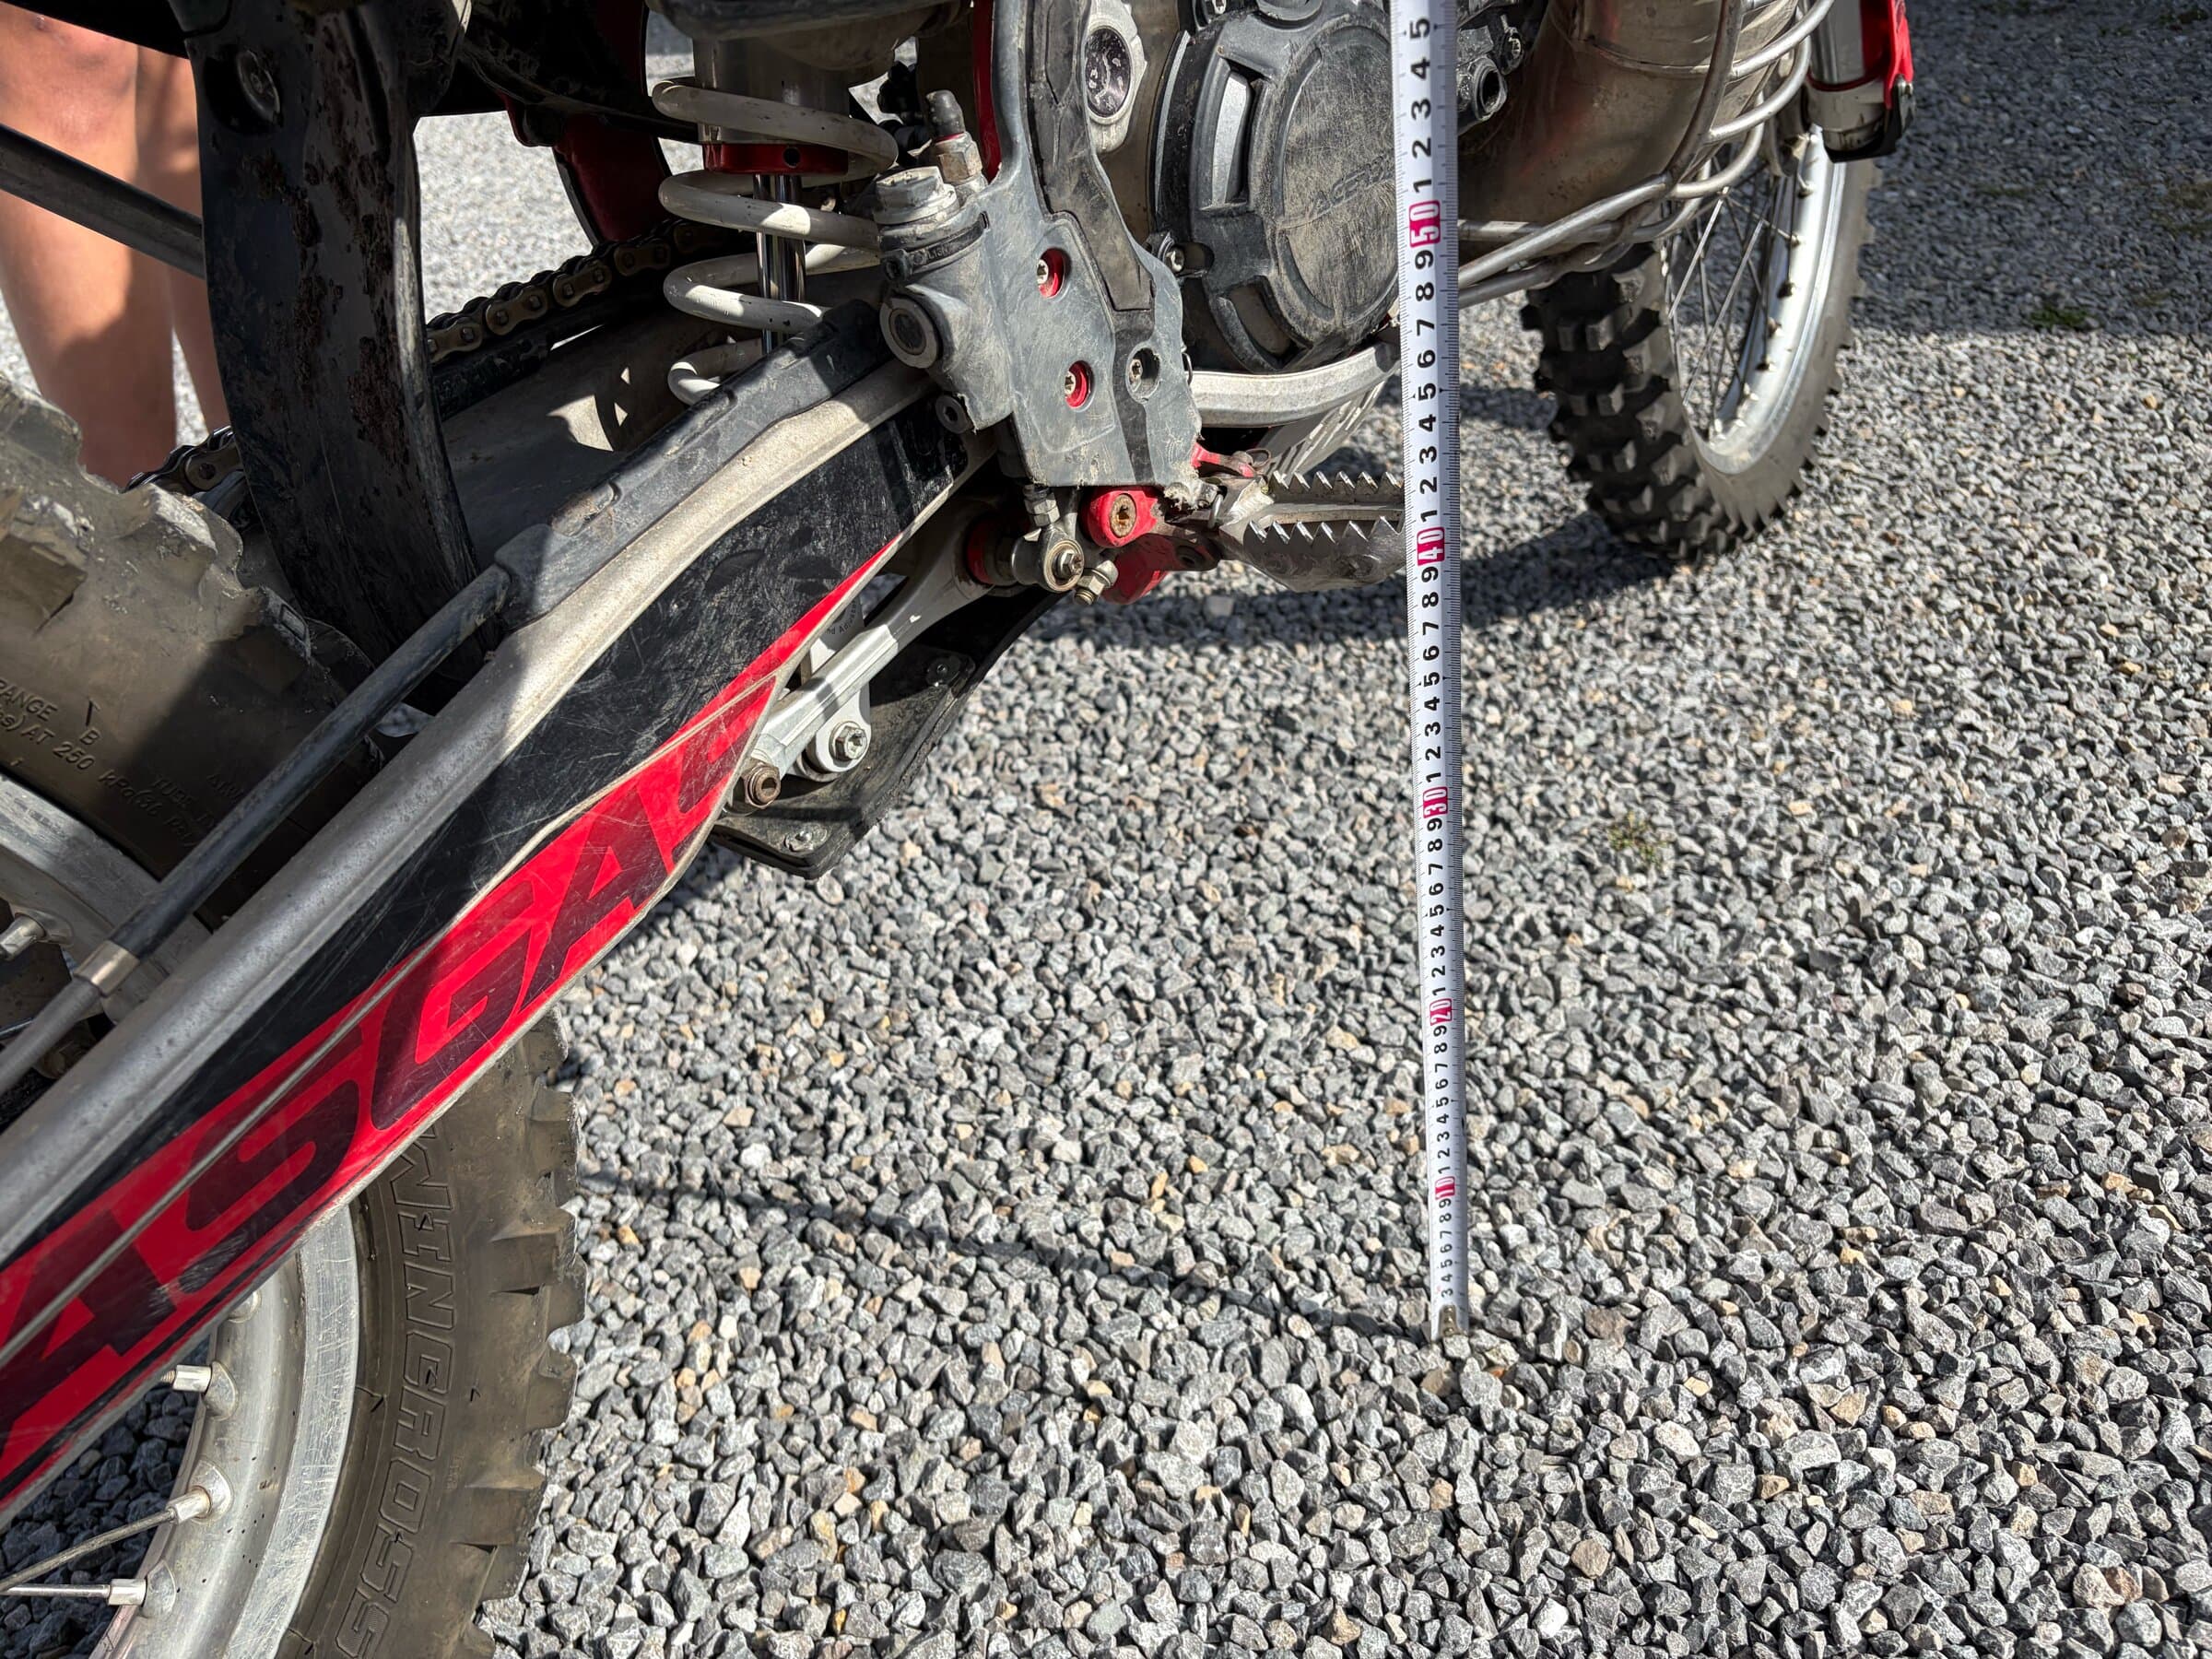
Measuring the footpeg
The mount fits every motorcycle whose footpeg is more than 35 cm above the ground. Measuring takes a minute, all you need is a tape measure.
- 01Stand the motorcycle upright on its wheels on level ground, without a rider.
- 02Measure the distance from the ground to the underside of the footpeg.
- 03If the result is more than 35 cm, the mount fits.
- 04Check that the footpeg is made of metal and has openings for the lock pin.
If you are not sure whether the mount fits your footpeg, write to us before you order.